
When it comes to sharing my work on the Raycast iOS app, I like to demo with live recordings instead of screen captures. There’s something natural and organic about it that I think works much better. You can see these clips on my twitter account or in some of the [Raycast YouTube videos, like our recent keyboard announcement.
I often receive replies asking how I create these clips. To me, there isn't much of a process or elaborate equipment involved—it's a pretty run-and-gun style. I usually shoot them in just 15 to 20 minutes.
I've decided to outline in a longer format, not limited by 240 characters, what I use and what I'm thinking while filming these clips.
Equipment
I think we all get curious about equipment and what others use, so let's start by listing what I have in my arsenal.

- Fujifilm XT5
- Sigma 18-50mm ƒ2.8 DC lens
- Tripod
- Smallrig Magic arm
- NEEWER Magnetic tripod mount
- Elgato Solid Arm
Camera Settings
I always shoot in 4K HQ, which on my Fuji uses 6.2K oversampling. This theoretically produces a better image than the standard 4K option, which I consider essential because it provides the best possible quality and allows for cropping or downscaling later if needed. Even when downscaling to HD, you'll achieve a sharper image.
I also avoid leaving any settings on auto, such as ISO, because this can adjust the exposure if your screen becomes darker or brighter during recording. Using all manual settings prevents this and keeps your exposure fixed.
Aperture
I avoid shooting with the aperture wide open. When you do this, you quickly lose focus on your screen. The smallest depth is amplified when your device is at an angle.
Instead, I aim fo a minimum of ƒ/4, but sometimes go up to ƒ/5.6. There's no hard rule here, just depends on lighting conditions at the time, and balancing with ISO that's not too high and grainy.
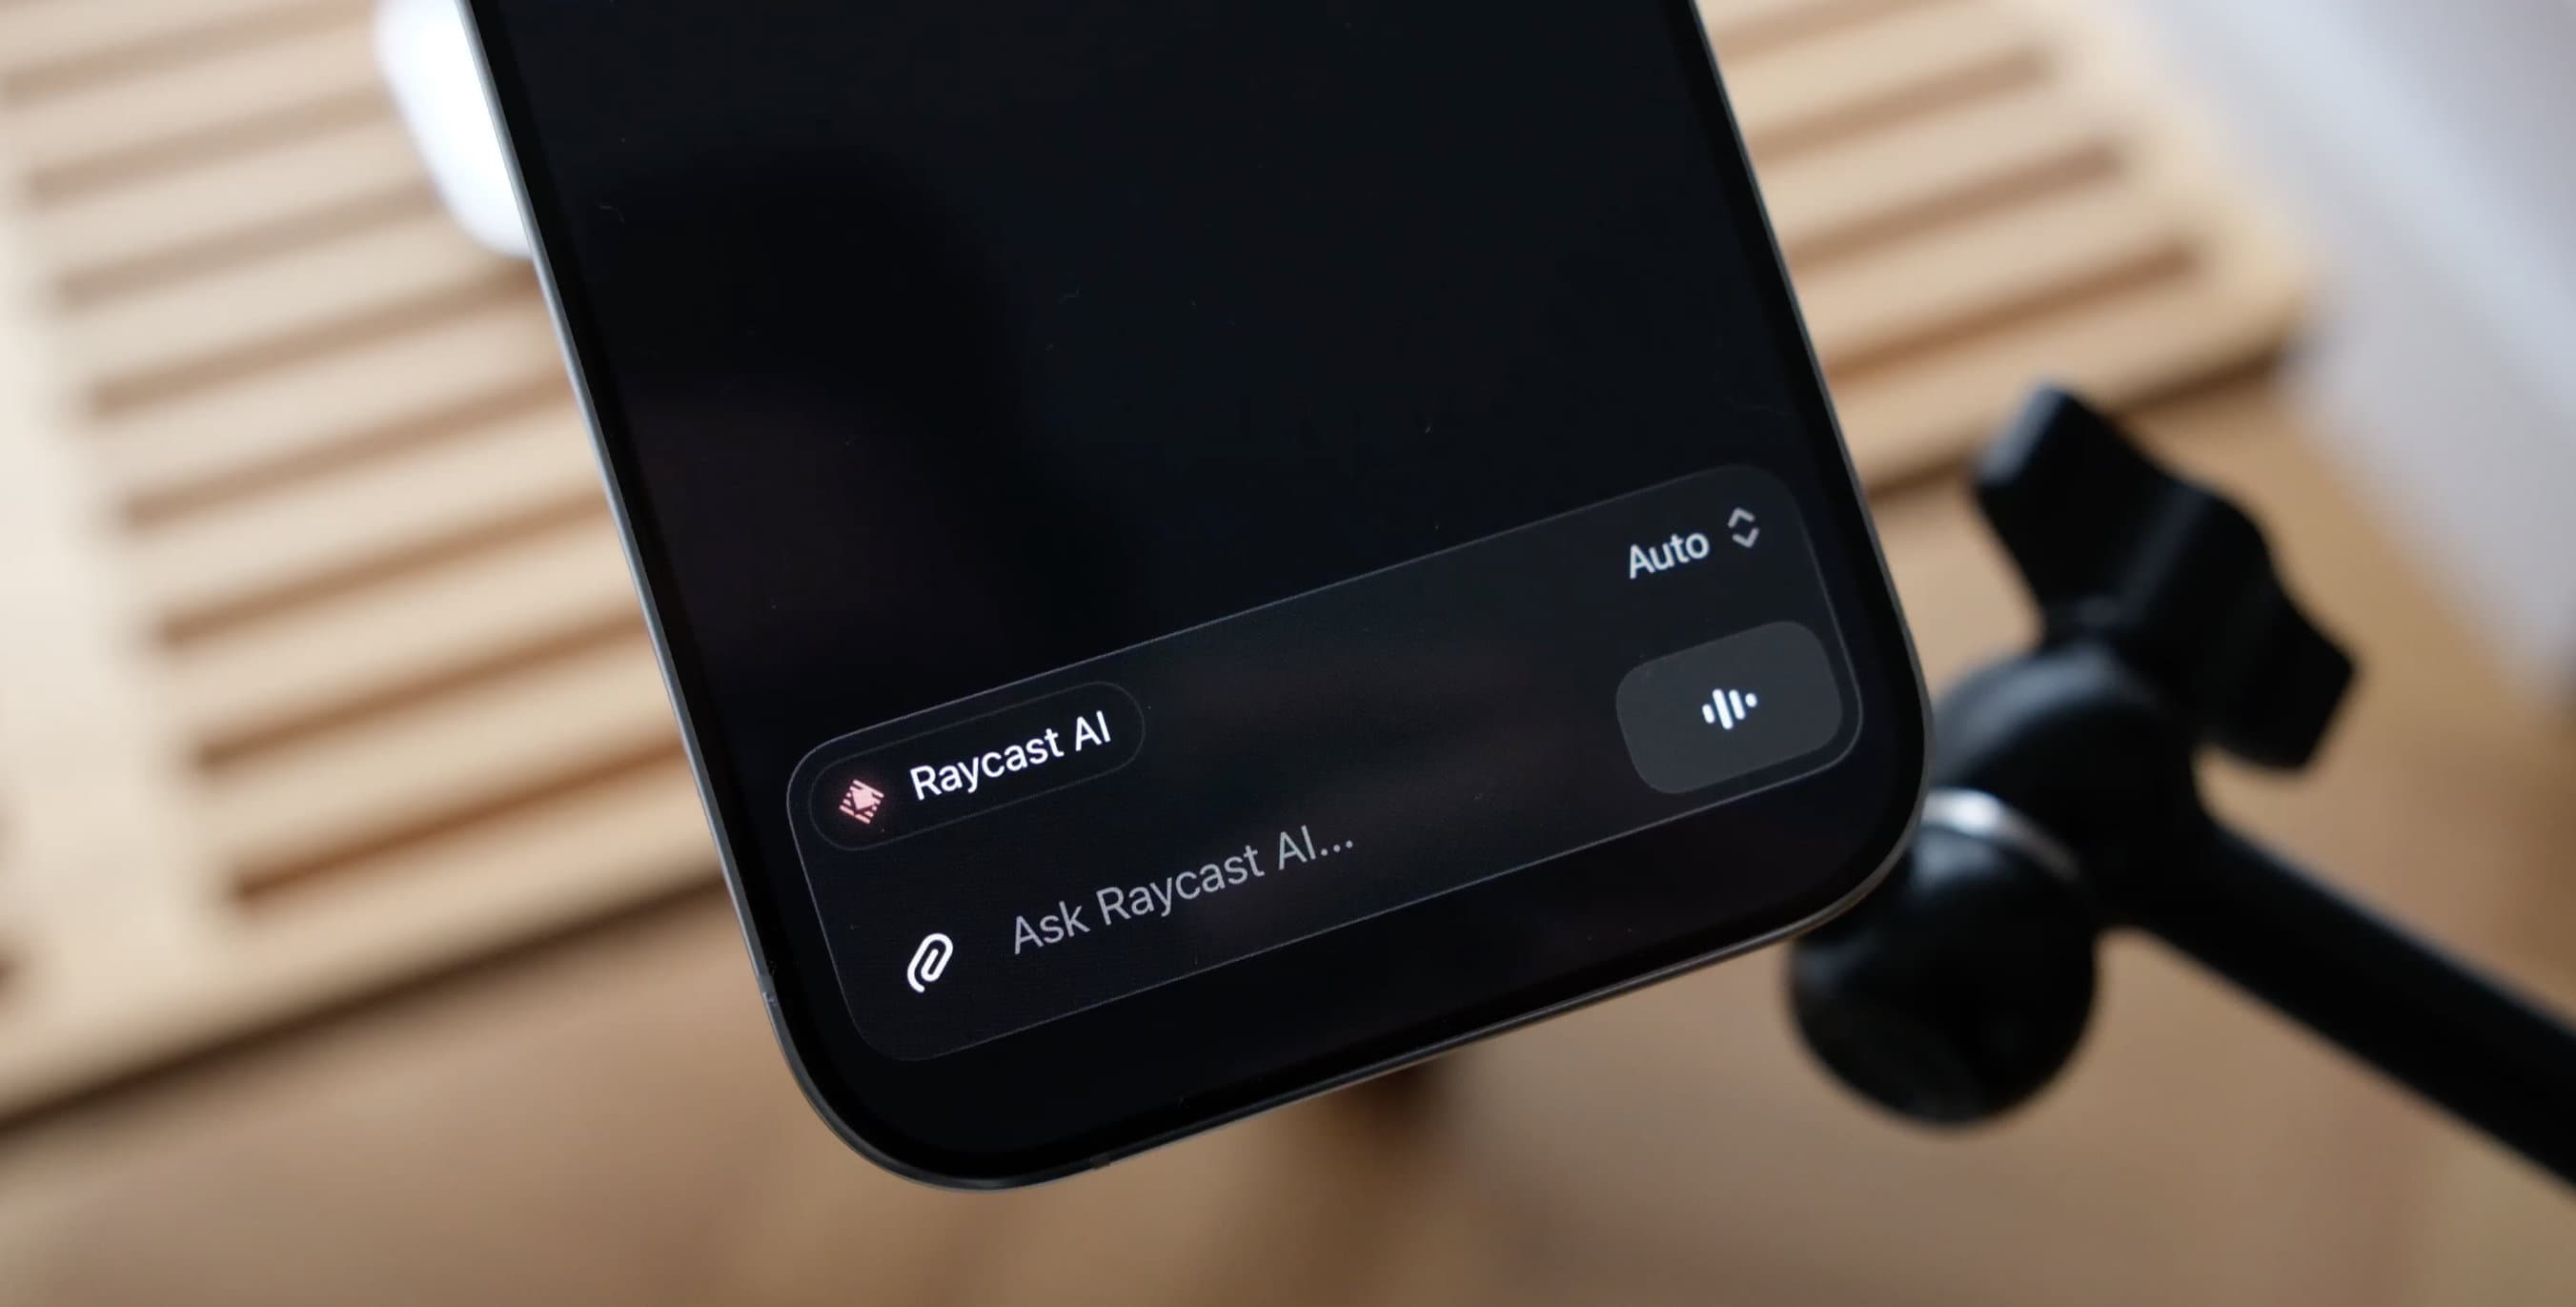
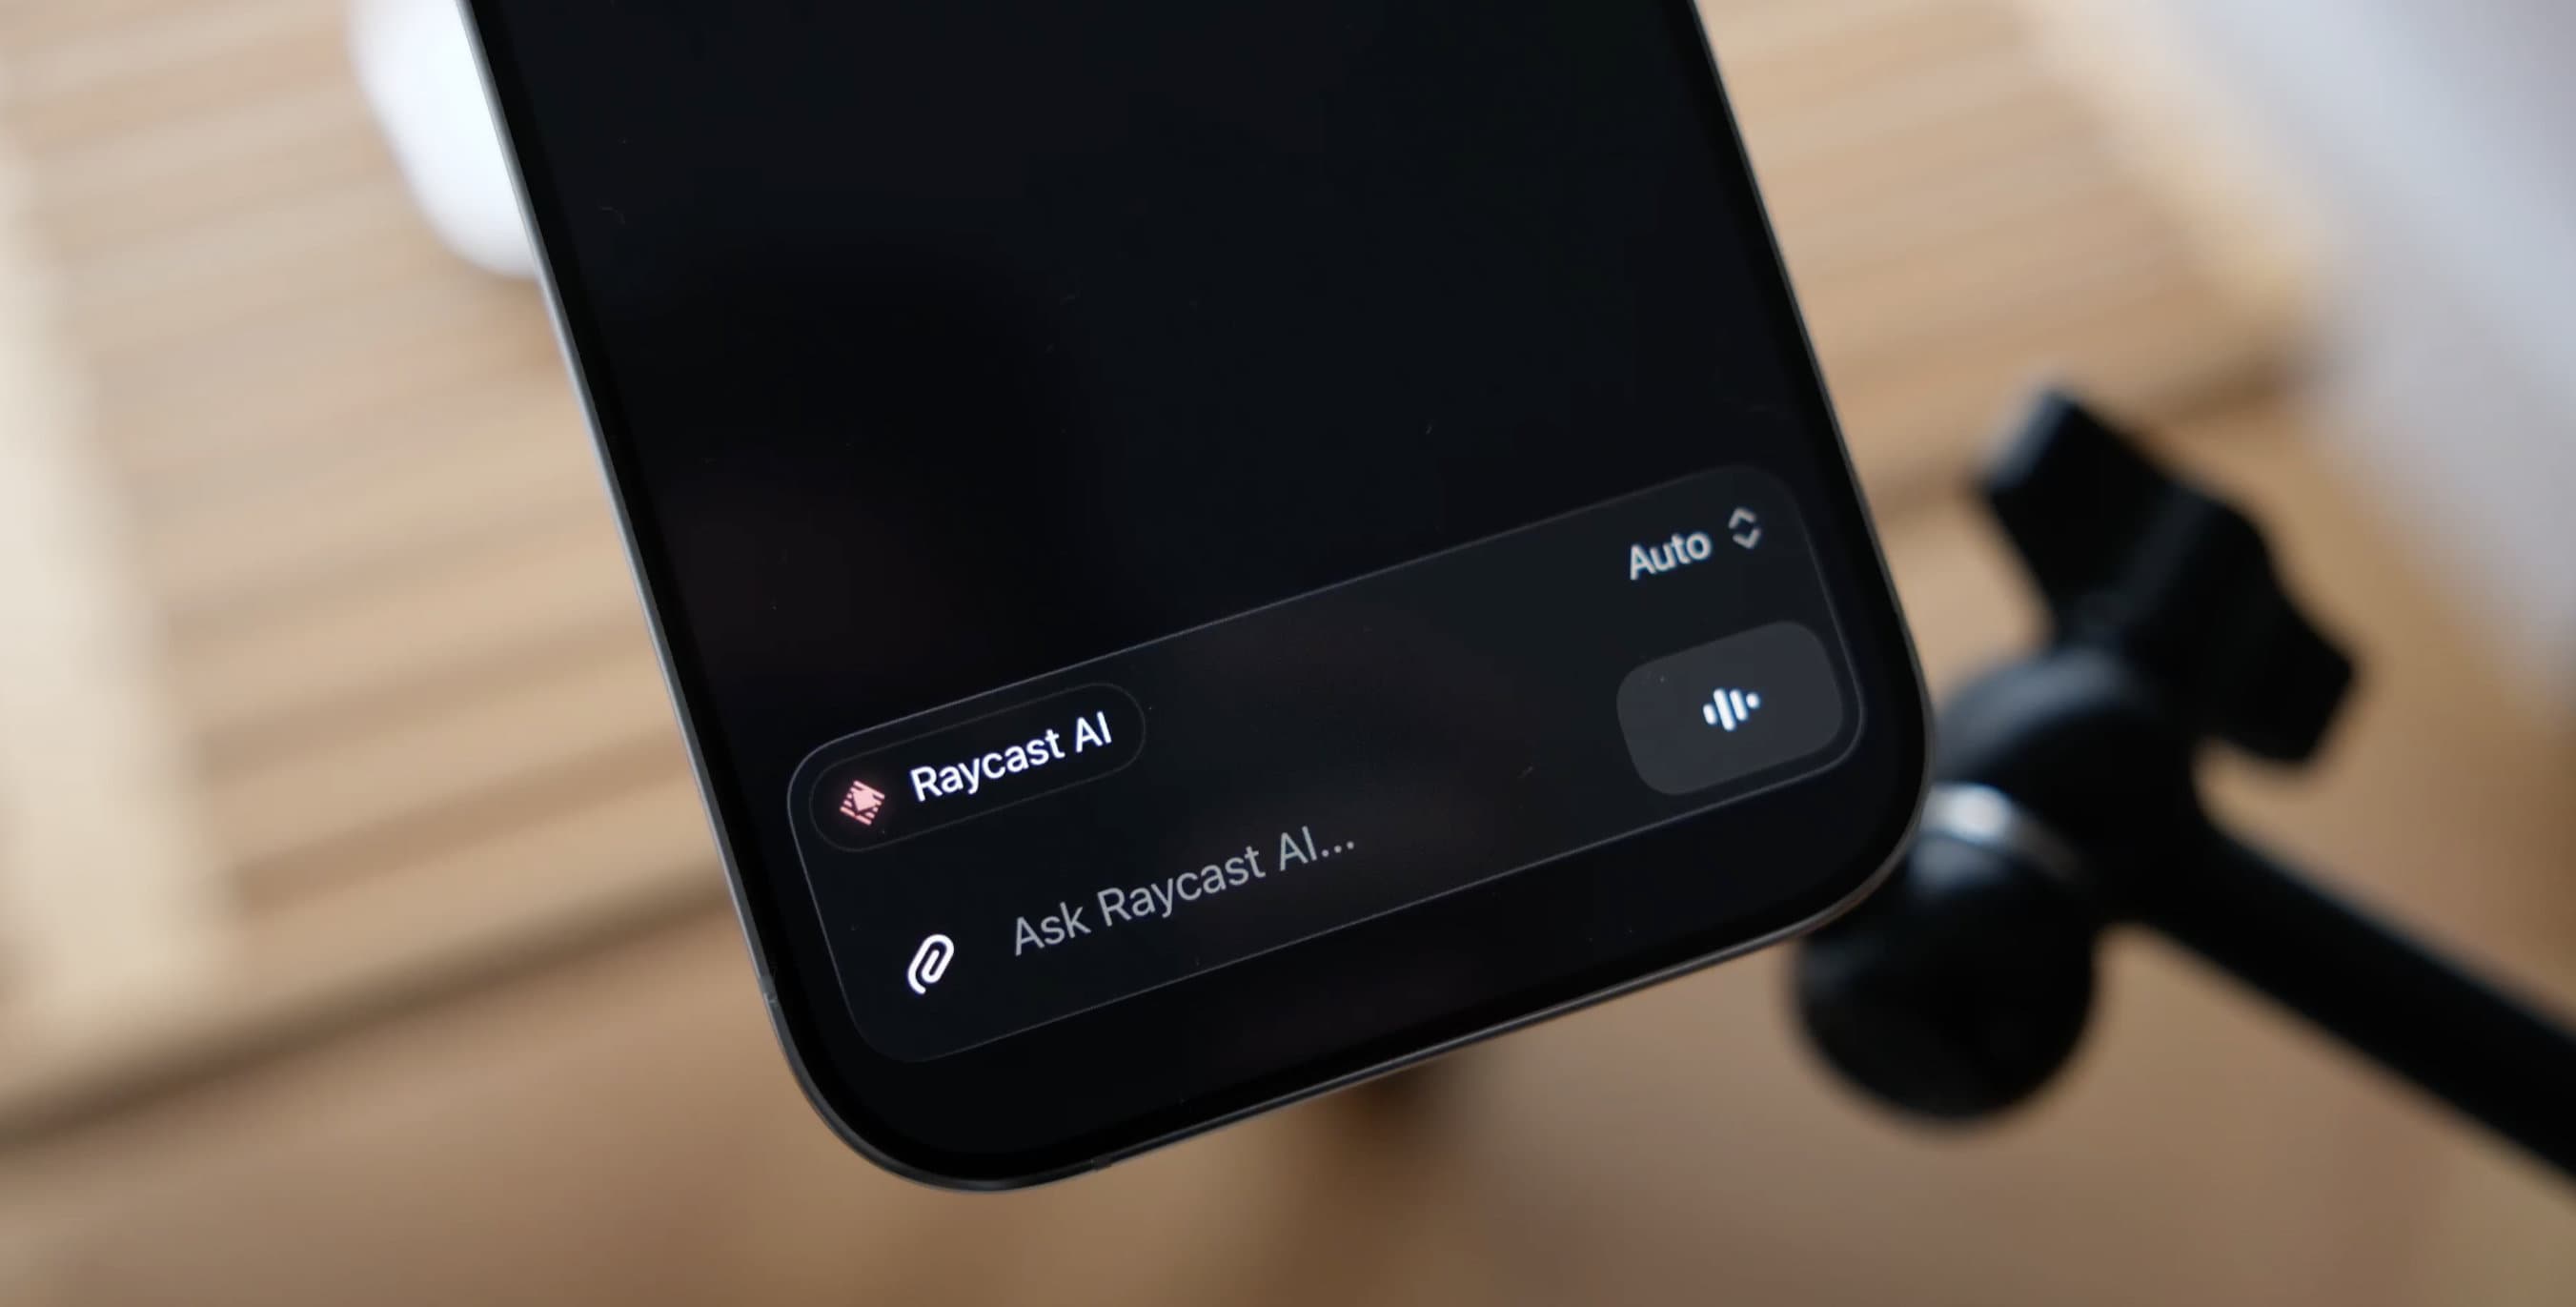
If you look at the comparison above, you'll notice around the auto label and the waveform button how soft it is at ƒ/2.8 vs sharper at ƒ/4.6. And there's still plenty of separation from the background.
Shutter speed
The only rule I live by and learned a long time ago is setting the shutter speed 2x your frame rate.
This is known as the 180 degree rule. And provides the most natural motion blur, closest to the human eye.
So if you shoot at 30fps, use a 1/60 shutter; or 60fps, use 1/120 shutter.
Focus
This varies; I alternate between autofocus and manual focus depending on how much my hands move in the scene and the duration of the shot. However, I tend to prefer manual focus.
Auto focus often picks up my thumbs on the screen and shifts focus away, which doesn't look good. When I do use auto focus, I limit the focus zone to the top half of the device, where my hands won't enter.
For shorter clips, I usually opt for manual focus since it ensures my hands won't move as much, resulting in a steadier shot with a fixed focal point.
Trusting manual focus will likely require some practice. Resting your elbows or forearms on a stool or your legs can help stabilize your hands.
Lighting
I don't use any artificial light sources while I film (maybe I should, but that's a whole new skill in itself). Luckily my living room has a large bay window, with indirect light until late afternoon. I just have to hope for a relatively bright day (which is not always the case in Wales), and it’s usually enough.
I would suggest to avoid having a window or direct light source on your screen as this will create harsh reflections and banding.
Static vs Handheld
I go back and forth on which of these setups I prefer. It's usually contextual to the output and what I'm focusing on.
For shorter clips or where I'm focusing on a smaller detail, having the device fixed is far better. Any small movement of your hand is amplified when zoomed in, and distracts from the detail you're trying to showcase.
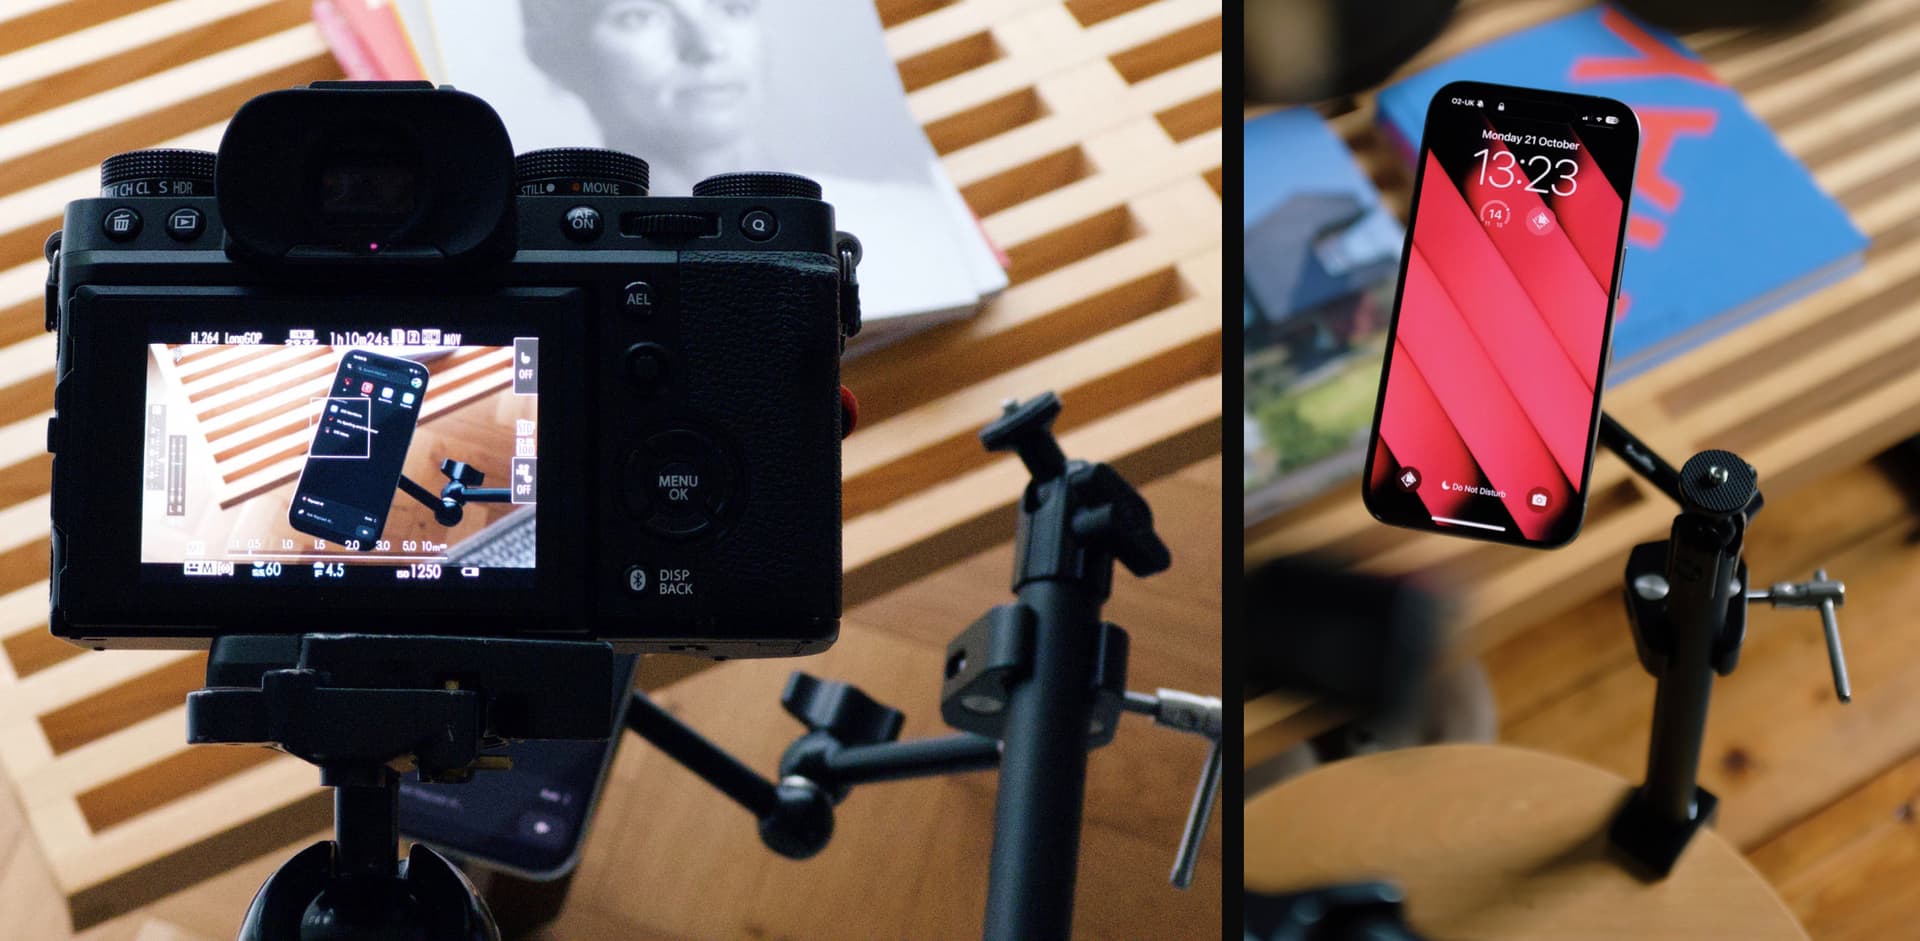
To achieve this I use some magic arms and a MagSafe adapter. It can be tricky to hide the arm, so you have to experiment and get creative. Usually it's behind my right arm, or I'm zoomed into a portion of the device.
Times where a fixed device doesn't work in my experience is longer videos where there's a few taps / interactions. It starts to feel unnatural if you reach your hand up outside of the comfort zone and the device doesn't move with it (maybe it's just me).
Also if I'm showcasing a whole feature or flow as opposed to a micro interaction, I want to show a more organic and relatable experience.
So in these scenarios, I actually prefer to go handheld, and embrace the subtle hand movement. I try not to move too much, to avoid falling out of focus or ending up in a different position from where I started.
You may notice above my right arm doesn't move, that's because I'm resting on my leg to stabilize. This helps hold my position in the frame. You could do the same with a desk.
But these are not rules.
In the below example, even though I'm focusing on the detail of the recording UI, I went handheld. In this scene it works because I'm showing how effortless the interaction is, and it's perfectly placed for my thumb without blocking any important details.
Tips while shooting
Each scene I need to shoot, I'll do at least 2-3 takes. Chances are when you review the footage, there's an undesired flicker, you fall slightly out of focus, or cover something up. It's better to get the takes in the same setup rather than reshooting (I've been there).
Wipe your screen before you film and in between takes if you're filming multiple scenes. There's nothing worse than watching your clips back and seeing that one spec of dust. Fingerprints can appear quickly too.
Editing
I actually don't edit these videos. There's no colour grading, or adjusting values. So I guess this is the area where I could invest the most and improve the output.
I simply use QuickTime to strip the audio, and trim the clips. Then I'll likely compress the videos, so they're not 500mb+.
To really level things up I could switch to shooting in s-log. This is the equivalent of shooting RAW in photography. The raw image is super flat, but you have all the control for grading the final output. With this I could develop a style and have more consistency across my clips. But given that these mostly live on Twitter (𝕏) that feels like a bit of an overkill IMO.
Compressing
Just a short 15 second clip can be around 200mb out of the camera. This is pretty large for sharing in Slack, or online. Obviously twitter will compress this for you. But I prefer to handle the compression myself to save my colleagues from having to download such large files while ensuring it still looks good.
There are many tools for converting videos, FFmpeg is a popular open source framework, and there's a handy extension in Raycast 😉. You can also use an app like Handbreak, and really fine tune the compression settings.
Room for improvement
My approach is not perfect. Even while reviewing my clips side by side for this post, I noticed an inconsistency in exposure.
One improvement I'd like to make is a better way to block reflections on the screen. So far, I've been trying to position my scene tactically near a blank wall. But there's usually still some form of reflection since my walls are white.
Purchasing one of these reflectors and using the black one should hopefully give me more reliable results by blocking any light or objects. Giving an even clearer shot of the UI with minimal distractions.
Another investment would be an external monitor. The camera is usually to my side or over my shoulder, which means I'm filming blindly. This is another reason why multiple takes are a good idea. An external monitor in front of me would help me align my shots better and keep everything in focus.
As previously mentioned, artificial lighting would significantly improve my consistency and enable me to film when daylight is limited. Definitely something for me to explore down the line.
Closing
If you've made it this far, thanks for reading. I hope there was at least one piece you could take away and use.
If you’ve tried any of these tips, I’d love to see what you’ve shot. You can share them on twitter @jordanamblin.